The Zombie Brain cocktail, with its vivid visual appearance and unique flavor profile, is an unforgettable addition to the world of cocktails. It features a carefully layered mix of liqueurs to create a captivating ‘brain’ effect, earning it popularity as a Halloween favorite and a conversation starter. This cocktail, despite its ominous name and unsettling look, offers a fruity and creamy flavor that is delightfully contrasting to its ghastly aesthetic, making it a perfect choice for those seeking a drink that’s tasty and instantly engaging.
The Zombie Brain, whose origins are intertwined with pop culture’s fascination with the undead, has over time secured its spot in the realm of themed cocktails. It is particularly savored during Halloween but is a year-round delight for those in search of a unique and memorable beverage. The cocktail’s visual appeal and distinct taste make it a top choice for parties, offering more than just a drink – it provides a comprehensive experience. This guide will walk you through creating your own Zombie Brain cocktail, covering everything from the required ingredients and equipment to the procedure, potential variations, and much more. Regardless of your mixology experience, crafting this remarkable cocktail promises to be a gratifying adventure.
Ingredients Required
Creating a Zombie Brain cocktail requires a careful combination of ingredients. Here’s the comprehensive list:
- 1 oz. Peach Schnapps
- 1/2 oz. Irish Cream
- 1/2 oz. Grenadine Syrup
- 1/4 oz. Blue Curaçao
- 1/4 oz. Crème de Menthe (optional, for a green hue)
Ingredient Spotlight: Exploring the Role of Each Ingredient
The uniqueness of the Zombie Brain cocktail lies in its distinct ingredients and the role each one plays:
- Peach Schnapps: This provides the fruity base for the cocktail, contributing a sweet, peachy flavor that balances the other elements.
- Irish Cream: When added carefully to the Schnapps, the Irish Cream creates a curdled, brain-like effect due to its reaction with the acidic Schnapps. Plus, it adds a creamy, slightly chocolatey flavor.
- Grenadine Syrup: This thick, sweet syrup sinks to the bottom of the cocktail, giving it a bloody effect. It also adds a sweet-tart flavor from its pomegranate base.
- Blue Curaçao: This orange-flavored liqueur provides a striking blue color that adds visual depth and an additional fruity note to the cocktail.
- Crème de Menthe (optional): If you want to add a slight green hue to your Zombie Brain cocktail for added creepiness, a touch of Crème de Menthe can do the trick. This mint-flavored liqueur adds a refreshing undertone to the cocktail.
Equipment Needed
Creating the Zombie Brain cocktail doesn’t require complex equipment. Here’s what you’ll need:
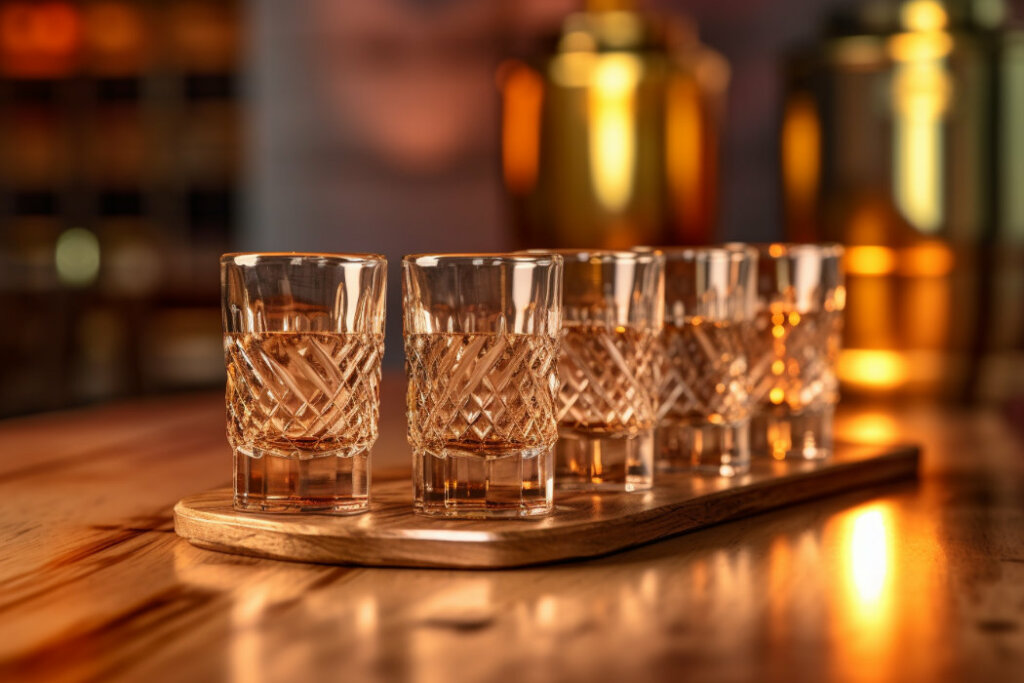
- Shot Glass: The Zombie Brain is typically served in a shot glass to accentuate its layered appearance.
- Pouring Spoons: These will help you carefully layer the different liqueurs to create the signature ‘brain’ effect.
- Cocktail Stirrers: You’ll need these to carefully mix the Irish Cream with the Schnapps.
- Jiggers or Measuring Tools: Accurate measurements are key to getting the flavor and visual appeal of the Zombie Brain cocktail just right.
- Optional – Pipette: This could be handy to drop the grenadine syrup at the bottom for a more pronounced ‘bloody’ effect.
With the right ingredients and tools in hand, you’re ready to start crafting your own Zombie Brain cocktail!
Step-by-Step Recipe
Here’s a detailed step-by-step guide to creating your own Zombie Brain cocktail:
- Pour the Peach Schnapps: Start by filling half of your shot glass with Peach Schnapps. This forms the base of your cocktail.
- Add the Irish Cream: Slowly pour the Irish Cream over the back of a spoon so that it floats on top of the Peach Schnapps. This should create a curdled, brain-like effect.
- Add Blue Curaçao: Using another spoon, slowly add Blue Curaçao to the glass. It should float on top of the Irish Cream, adding a layer of vibrant blue.
- Drizzle the Grenadine: Lastly, use a pipette or a carefully controlled pour to add the Grenadine to the glass. It should sink to the bottom, creating a bloody effect.
- Optional – Green Hue: If you want to add a slight green hue, you can add a few drops of Crème de Menthe on top.
Tips for Perfecting Each Step
- Ensure that your Peach Schnapps is chilled before you start. This will help the layers stay separate.
- Pour the Irish Cream slowly over the spoon to avoid it mixing with the Schnapps. This will help create the distinct ‘brain’ look.
- Be gentle when adding the Grenadine to ensure it sinks to the bottom without disturbing the other layers.
Troubleshooting Common Mistakes
Making the Zombie Brain cocktail is more art than science, and it might take a couple of tries to get it just right. Here are a few common mistakes to avoid and their remedies:
Problem: The Irish Cream mixes with the Schnapps instead of forming a separate layer.
Solution: Make sure you’re pouring the Irish Cream very slowly over the back of a spoon. The spoon acts as a barrier, slowing the pour and helping the Cream float on top of the Schnapps.
Problem: The Grenadine mixes with the other ingredients instead of sinking to the bottom.
Solution: Try using a pipette to carefully add the Grenadine directly to the bottom of the glass. Alternatively, pour the Grenadine slowly down the side of the glass.
Problem: The cocktail doesn’t have the desired ‘brain’ appearance.
Solution: Make sure you’re using chilled Peach Schnapps and pour the Irish Cream slowly and carefully. It might take a few tries to master the technique, so don’t get discouraged if it doesn’t look perfect the first time.
Remember, practice makes perfect! With a little patience and attention to detail, you’ll be creating spectacular Zombie Brain cocktails in no time.
Flavor Profile and Pairings
The Zombie Brain cocktail presents a unique flavor profile that is both visually stunning and delightfully surprising. The peach flavor from the Schnapps provides a sweet, fruity base, while the Irish Cream adds a creamy, slightly chocolatey note. The addition of Blue Curaçao imparts an orange-citrus taste that adds a layer of complexity. Grenadine syrup lends a sweet-tart touch that balances out the creaminess. Finally, if used, the Crème de Menthe offers a refreshing hint of mint.
When it comes to food pairings, consider foods that complement the sweet and fruity notes of the cocktail. Some suggestions might include:
- Sweet treats: Mini cupcakes, chocolate-covered strawberries, or fruit tarts can complement the sweetness of the cocktail.
- Salty snacks: Pretzels, cheese platters, or seasoned nuts can provide a contrast to the drink’s sweetness.
- Spooky themed appetizers: If you’re serving this at a Halloween party, you might consider ghost-shaped cheese bites, mummy dogs, or other festive finger foods.
Variations and Adjustments
While the traditional Zombie Brain cocktail recipe is quite straightforward, you can experiment with different twists to suit your taste or dietary restrictions.
- Vegan variation: Replace the Irish Cream with a non-dairy Irish Cream alternative.
- Fruity twist: Swap Peach Schnapps with Raspberry Liqueur for a berry-flavored Zombie Brain cocktail.
- Creamier variant: Increase the quantity of Irish Cream for a creamier and less fruity version.
Remember, the key to a great cocktail is to experiment and find what you love!
Presentation Tips
Presentation is key when serving a cocktail as visually unique as the Zombie Brain. Here are a few tips to amp up your presentation game:
- Garnish: Though the cocktail itself is visually striking, you can add a spooky garnish like a fake spider or a cocktail skewer with gummy brains for added effect.
- Glassware: Use a clear shot glass to showcase the layers and colors of the cocktail. Consider chilling the glass beforehand to keep the drink cool longer.
- Serving Suggestions: If you’re serving this at a party, consider using a serving tray with Halloween-themed decorations like fake cobwebs or plastic skeletons for an immersive experience.
Remember, the Zombie Brain cocktail is as much about the spectacle as it is about the taste, so don’t be afraid to go all out with your presentation!
Hosting a Zombie Brain Cocktail Party
The Zombie Brain cocktail is an excellent centerpiece for a themed party. Here are some tips and tricks to make your gathering a hit:
- Cocktail Station: Set up a cocktail station with all the ingredients for the Zombie Brain cocktail. You could also print out the recipe and instructions to allow guests to make their own.
- Food Pairings: As we’ve discussed earlier, offer a selection of sweet and salty snacks that pair well with the cocktail.
- Interactive Activities: Consider adding interactive elements like a ‘best Zombie Brain cocktail’ competition or a themed trivia game to keep guests entertained.
When it comes to decorations and accessories, a zombie theme is all about embracing the spooky and the unusual. Here are a few ideas:
- Decorations: Use a mix of creepy decorations like plastic brains, zombie cutouts, fake cobwebs, and eerie lighting to set the mood.
- Costume Party: Encourage guests to dress up in zombie-themed costumes to add to the fun.
- Themed Accessories: Consider providing themed accessories like zombie masks, fake blood, or glow-in-the-dark necklaces for guests to wear.
Frequently Asked Questions
Here are answers to some common queries about the Zombie Brain cocktail:
Q: Can I make a large batch of the Zombie Brain cocktail in advance?
A: Due to the layered nature of the cocktail, it’s best made one at a time. Pre-mixing could lose the ‘brain’ effect.
Q: What can I use instead of Peach Schnapps?
A: You can use another fruity liqueur like Raspberry Liqueur, but this will change the flavor profile of the cocktail.
Q: Can I make this cocktail alcohol-free?
A: You can experiment with non-alcoholic substitutes like peach juice or syrup, cream or milk, and grenadine, but the ‘brain’ effect may not be the same.
Q: How can I make the ‘brain’ effect more pronounced?
A: The key is to pour the Irish Cream slowly over the back of a spoon. This should help it float and curdle, creating the ‘brain’ effect. It might take a little practice to perfect!